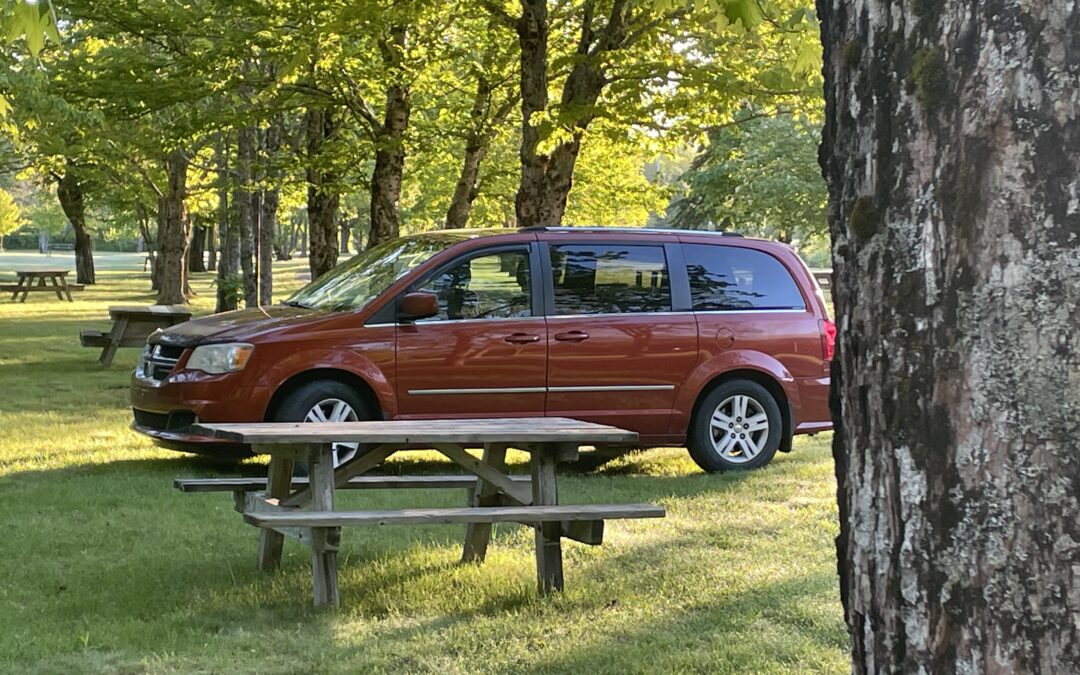
I get asked a lot about Vinny Van Gogh, my 2012 Dodge Caravan that has been converted for camping. Vinny has taken us from East Coast Canada to New Mexico, USA and everywhere in between.
People love to come up to us and ask where we are from. The next questions are inevitably about how we built out our van.
At the time we built it (September 2022) I didn’t know I would be sharing a step-by-step how to post with all of you. Had I known, I might have taken better photos of the process!
In any case, I will share how we did it.
There will be another post all about our adventures in it.
His next BIG adventure will be our wedding trip north of the artic circle, where we are planning to get hitched in Summer 2025!
The Vehicle
My daughter wrote-off my 2009 Honda Civic in the summer of 2022. Since she hadn’t been seriously hurt in the accident, I couldn’t even get upset. I had told myself that when the Civic needed to be replaced I was finally going to buy a van and convert it for camping.
It was time to replace the Civic. I had been waiting for this moment!
I bought a used 2012 Dodge Caravan crew cab with stow-away seats for $7,000. As part of my minimalist lifestyle, I stopped spending money on new vehicles years ago and neither it’s age nor it’s mileage worried me.
I was ready to begin the conversion!
Overview
I had been watching and following van lifers and casual van campers for years on YouTube. I shared a few ideas with Sweetie and he got busy. He did the whole build in our driveway with pretty limited tools.
Our build did not damage the van in any way. All pieces set securely in place.
We don’t plan to live in our van, like some people do. We were looking for a comfortable place to sleep and a reasonable way to store necessities like food, water, and clothes.
We jokingly say we built a hard-topped mobile tent, but it’s not that far from the truth!
Step 1: The Platform Base
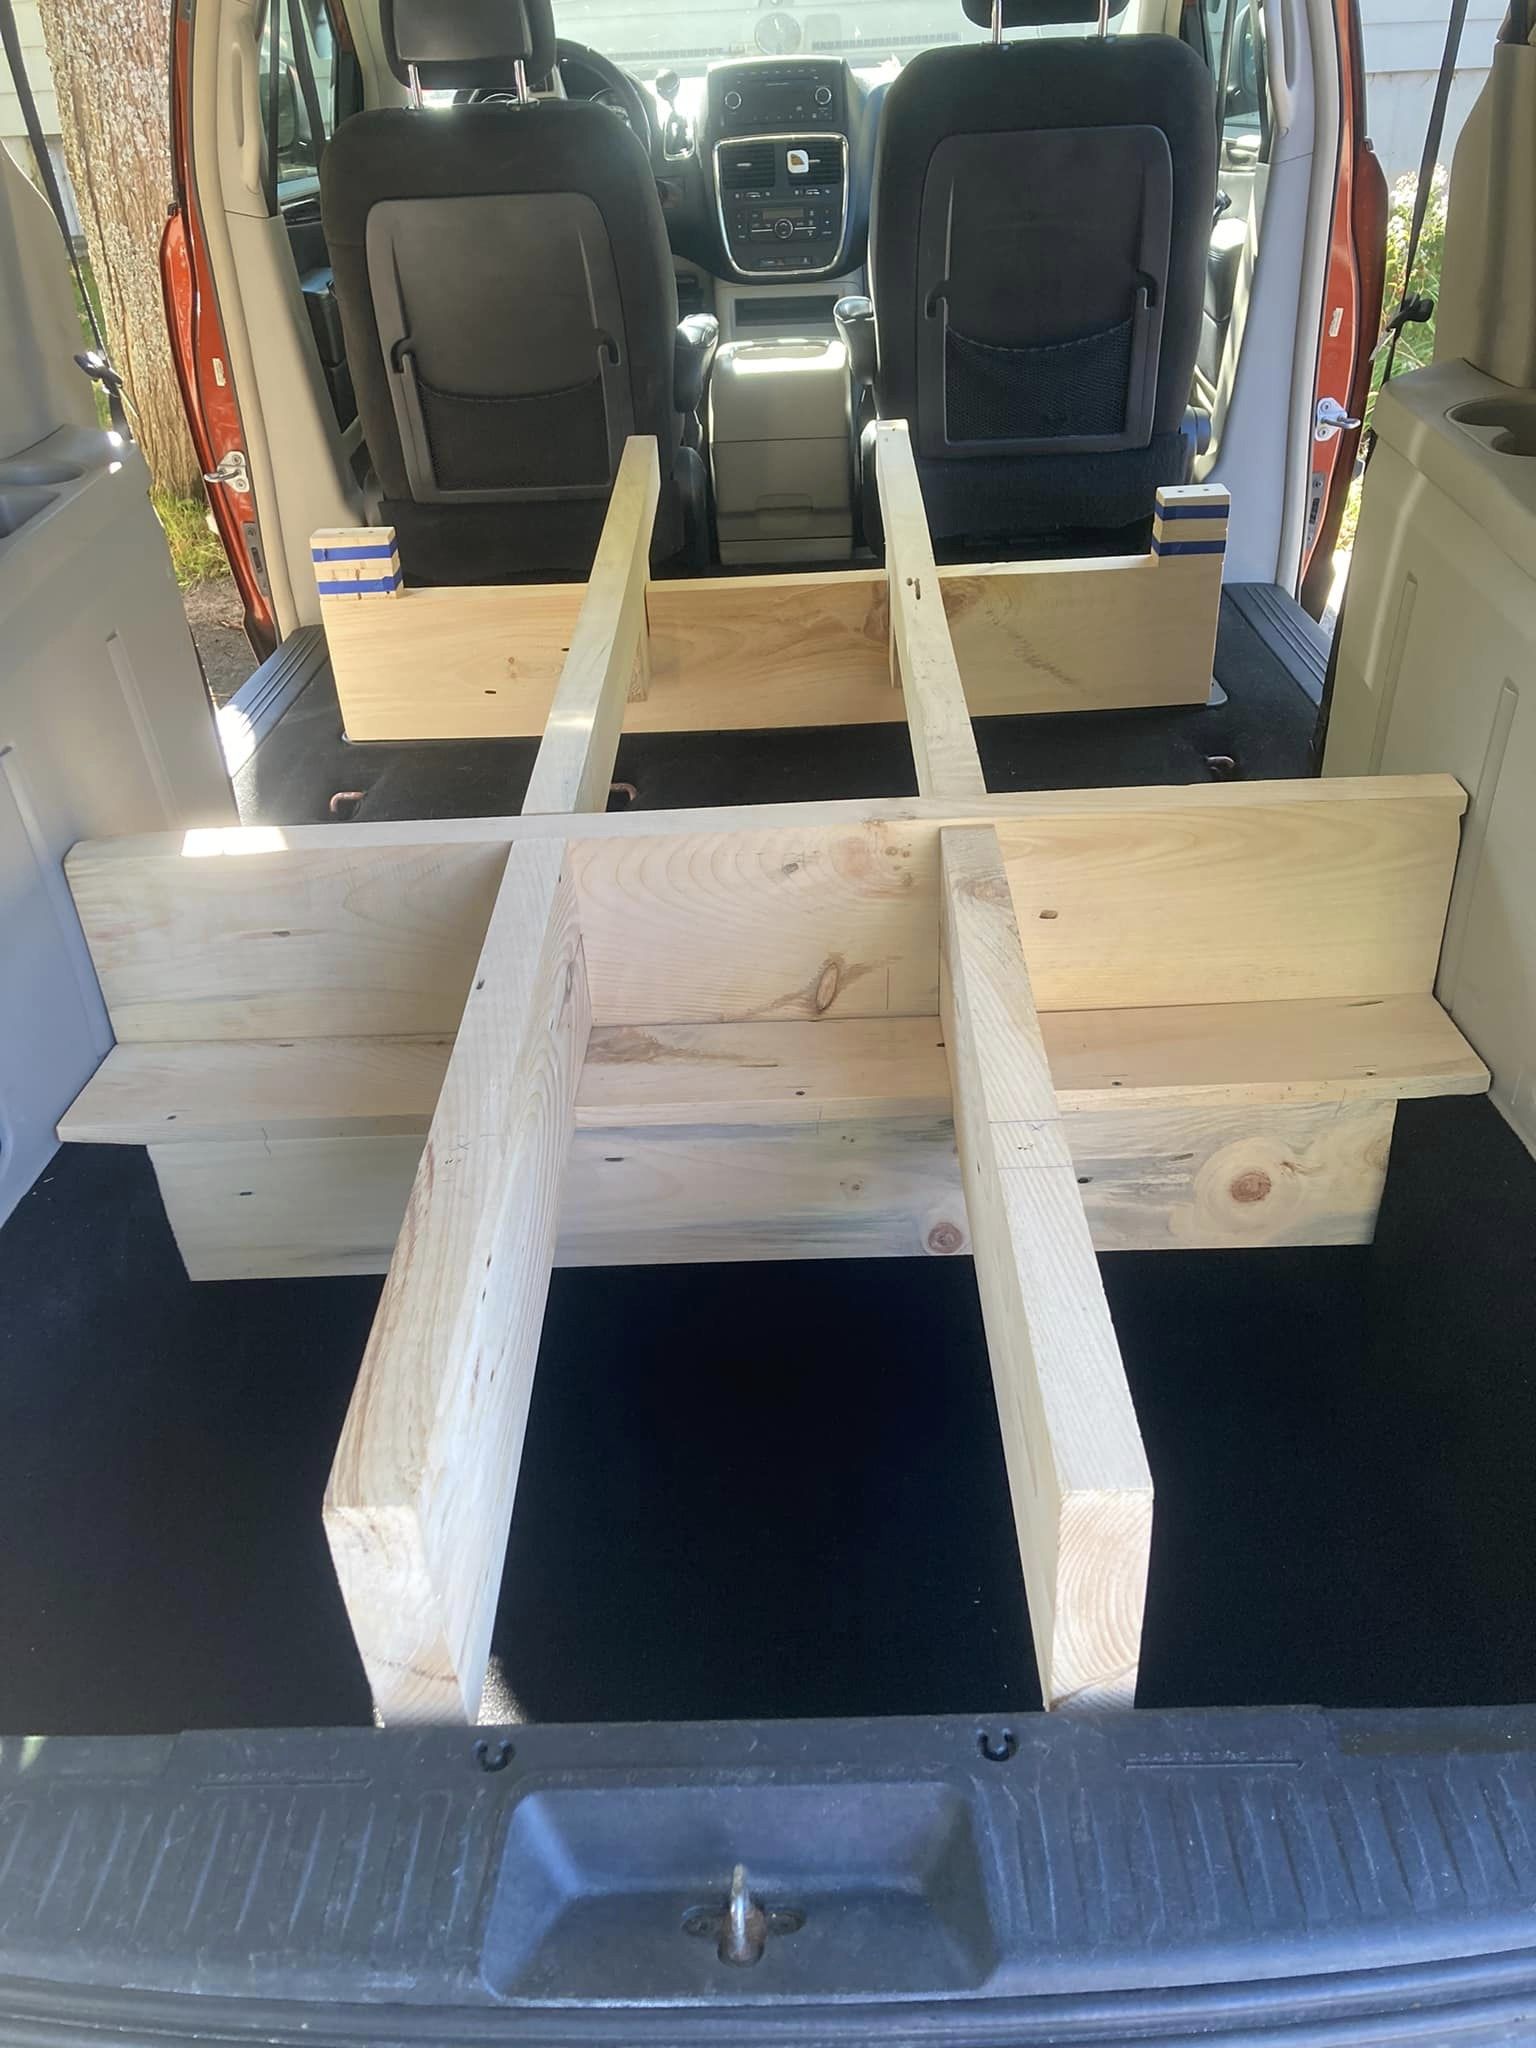
The first thing Sweetie did was remove all the seating in the back. Since it is stowaway seating that folds flat we could have left the seats folded down but decided to use those stowaway compartments as storage instead.
He constructed a base for the platform that has 9 storage sections. The boards are notched to hold them in place with one another and slightly angled so that the platform is level. To put it together you set your boards in place one by one. No screws required.
It is difficult to tell from the photo, but the section at the back (that looks like a little bench) sits down into the stowaway compartment, holding it in place. This piece goes in first.
The two width-wise cross-sections are set in place next. One rests on top of the “bench” and the other goes at the front, just behind the stowaway access.
The long, length-wise boards get put in place last. The ends of these boards are just shy of the driver and passenger seats when the seats are positioned all the way back.
If you look closely you will see that there are notches in these boards that allow us to more easily access the center portions of the platform for storage or store longer items (like a fishing pole or campfire roasting sticks) width-wise.
My dad has a portable sawmill and he provided three 2×8’s and 2 – 3/4×8’ to us free of charge. I estimate that we would have had to pay $150 for this wood, but that will vary depending where you live.
Step 2: Bed Base
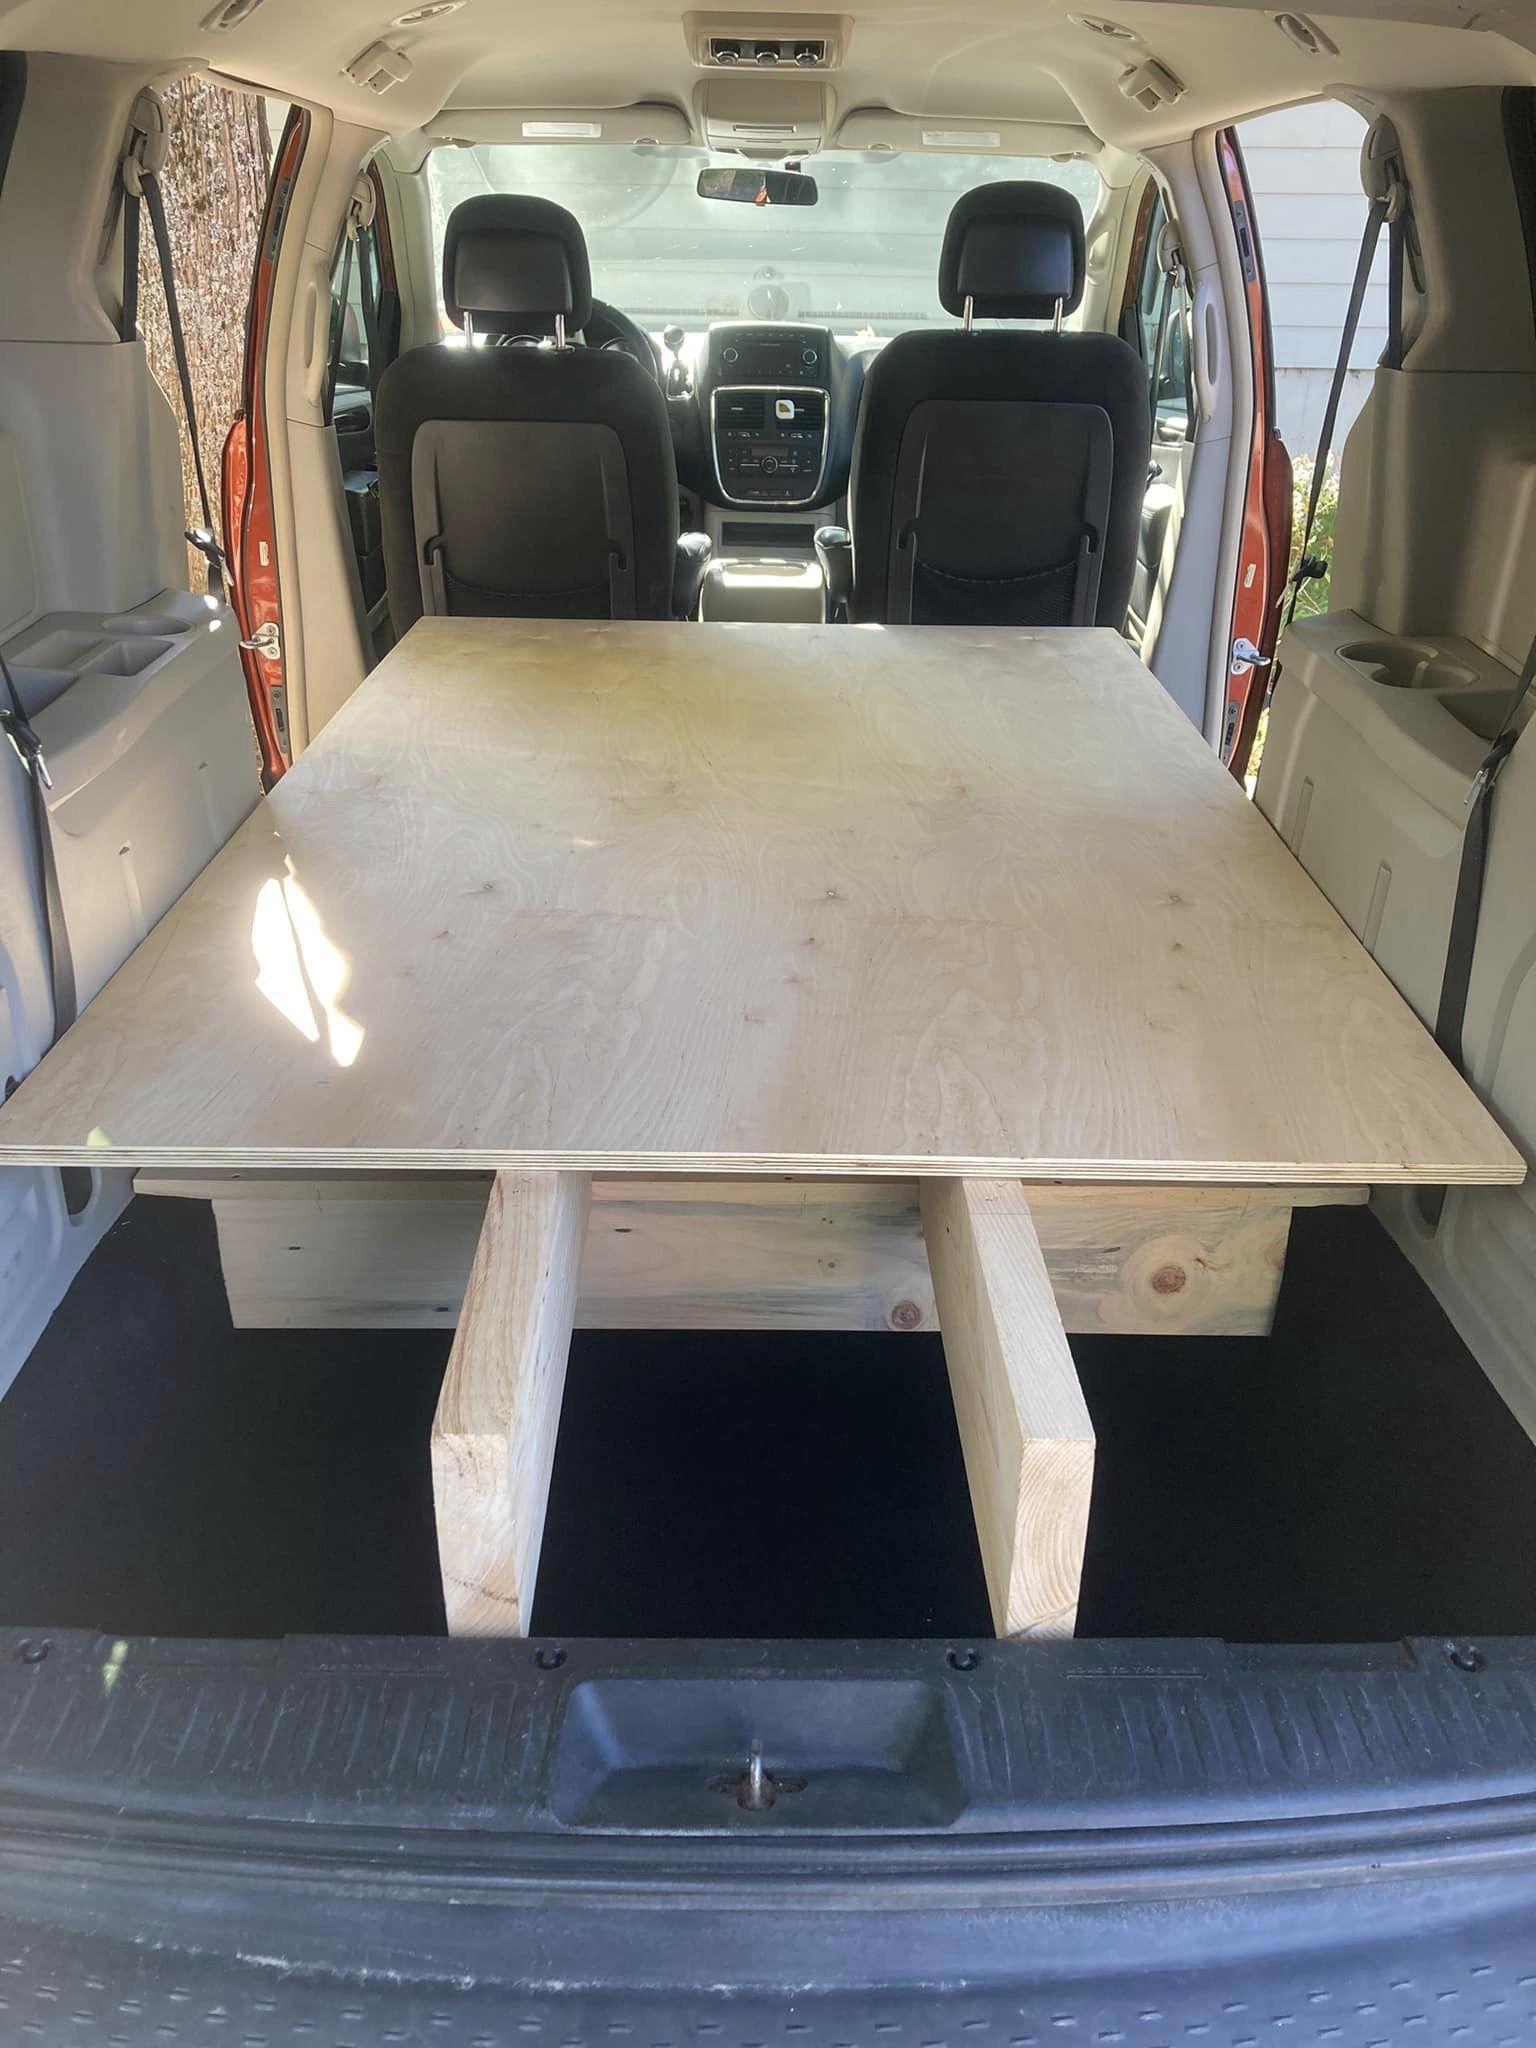
The bed base was pretty simple. We purchased one piece of birch plywood for $90.
We paid an extra $2 to have the store cut 2 feet off the end. This piece was saved to use later.
Step 3: The Bed
I don’t want to say we’re old, so let’s just say we’re not young. Comfort matters.
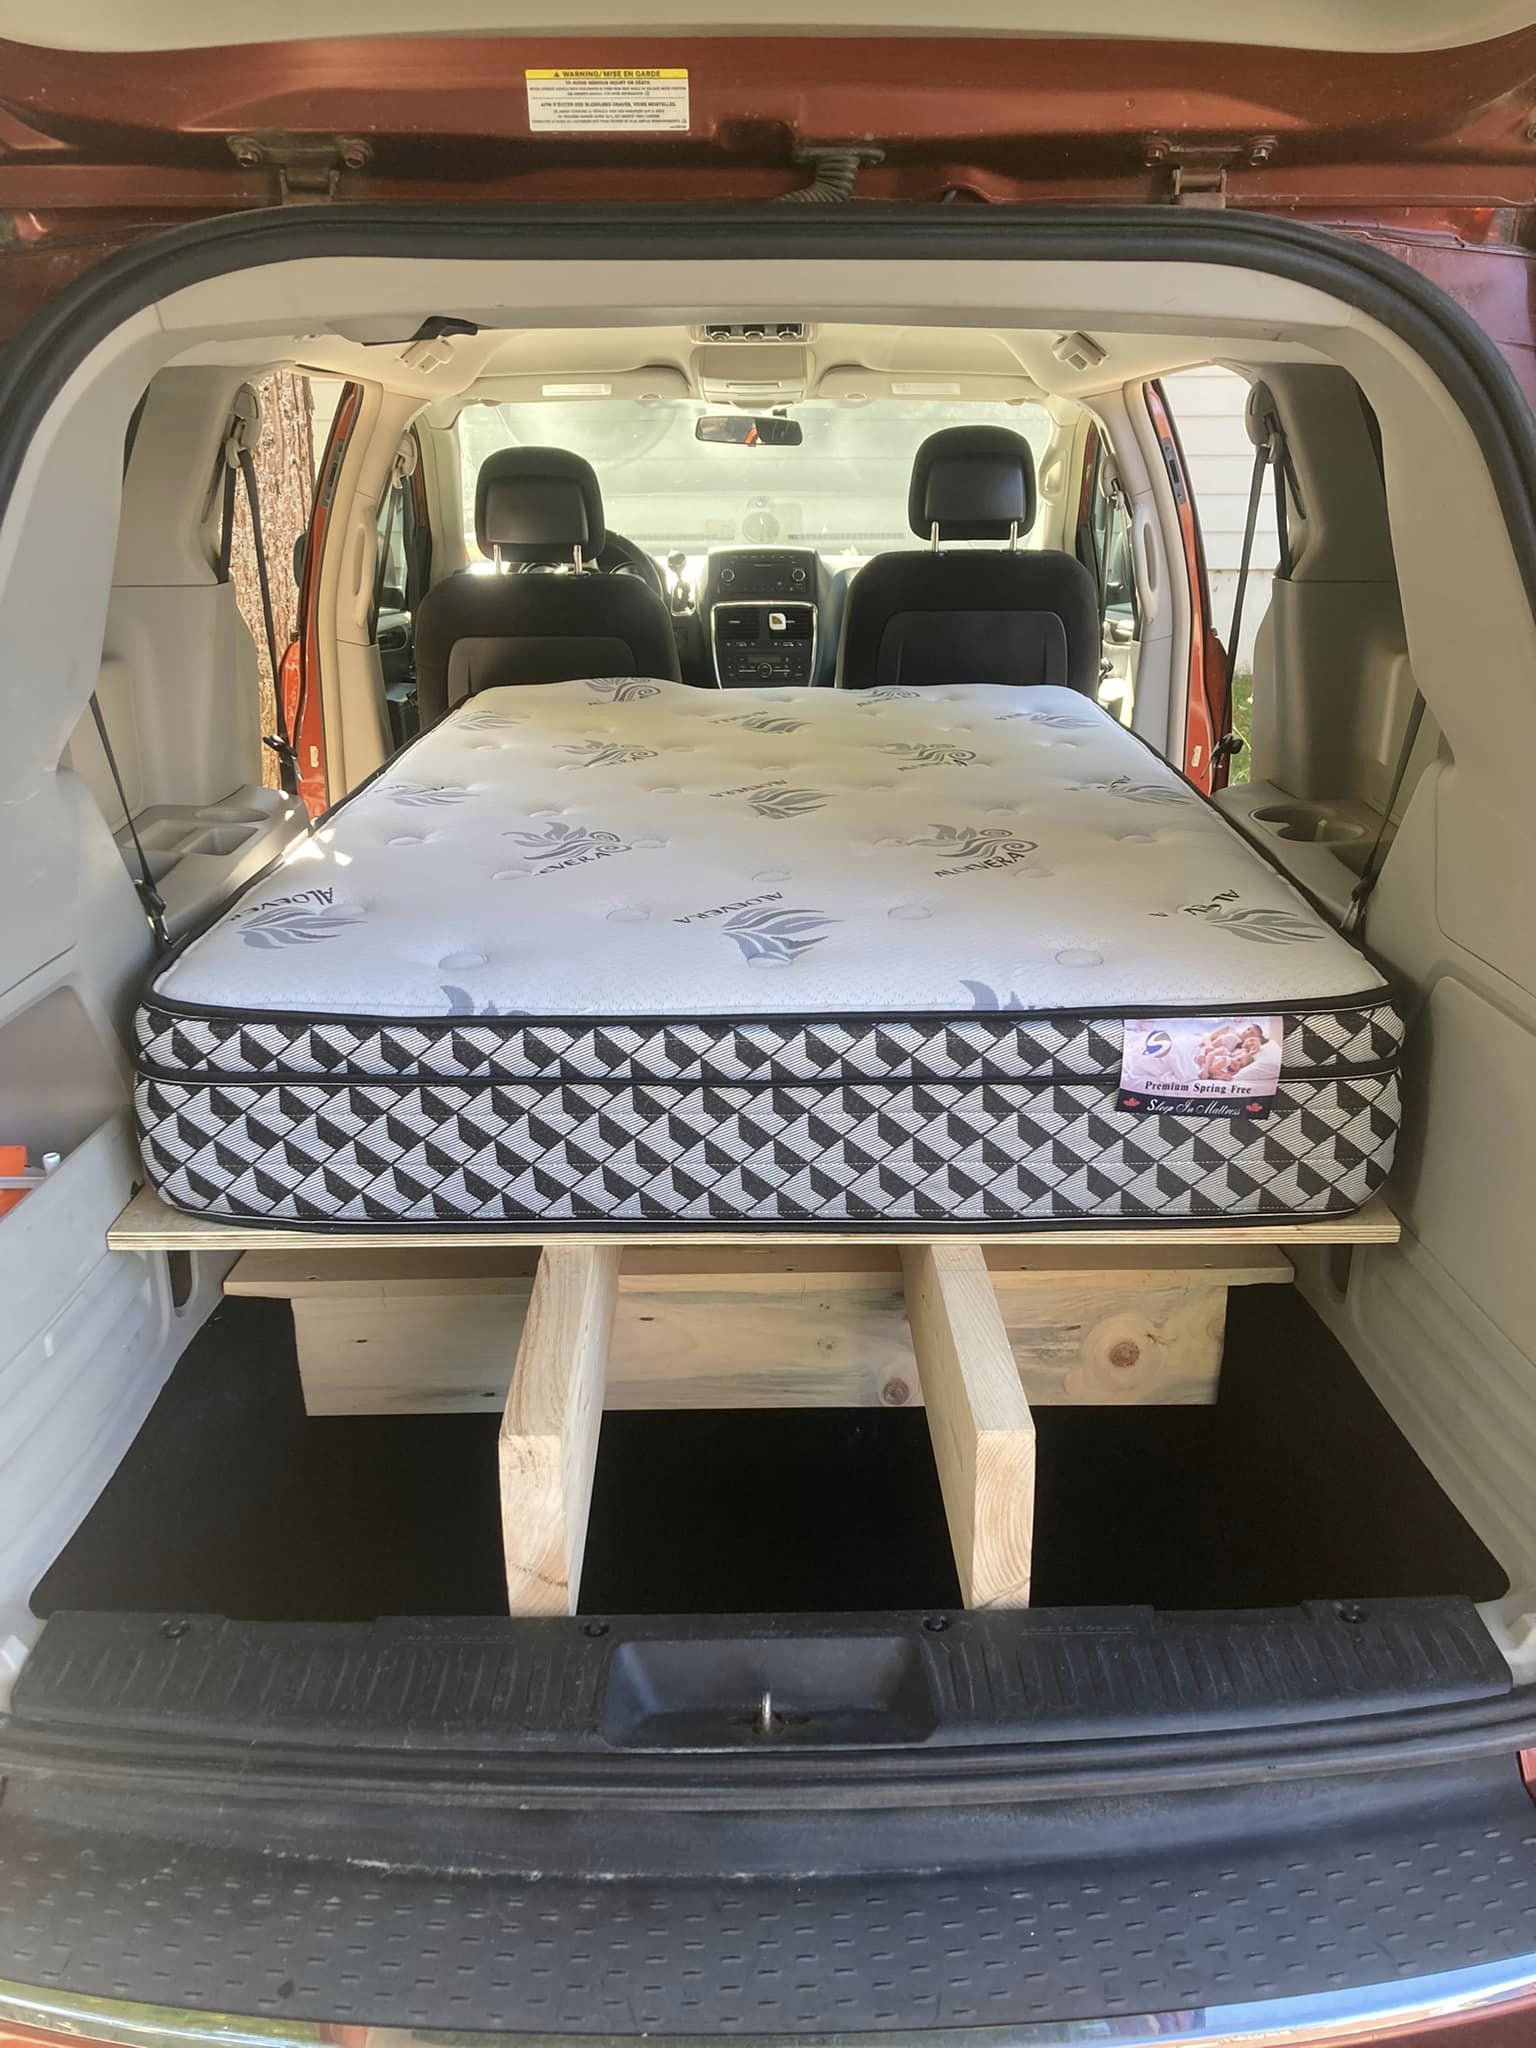
We knew from the start of the build that we wanted a real mattress in the van.
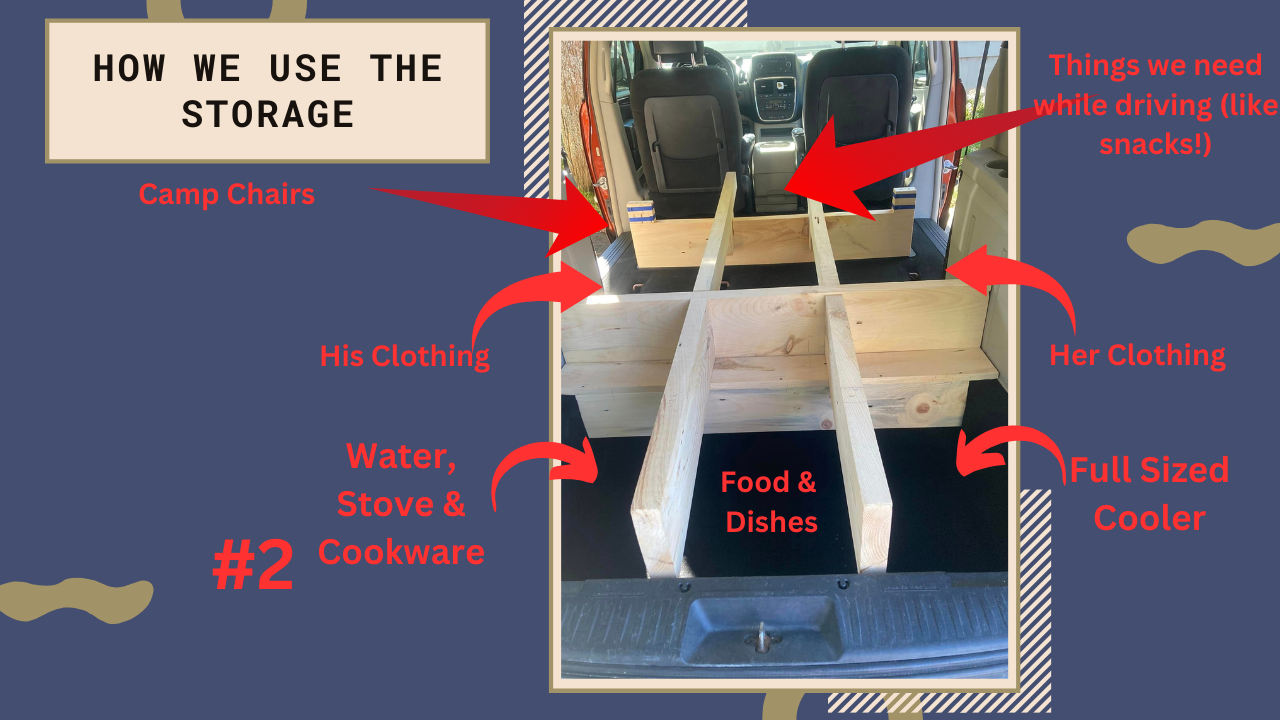
As luck would have it a 3/4 mattress fits perfectly. We purchased this spring free mattress new for $460 and set it in place.
I’m 5’5” and I can sit up on the bed and stretch out any way I would like.
Sweetie is 6’ 2”. He has to maneuver into bed a little more carefully than I do, but after 20 years of miliary life he says he’s slept in worse conditions. His feet extend beyond the end of the mattress. We slide the seats forward when sleeping to accommodate his long legs.
Step 4: The Headboard
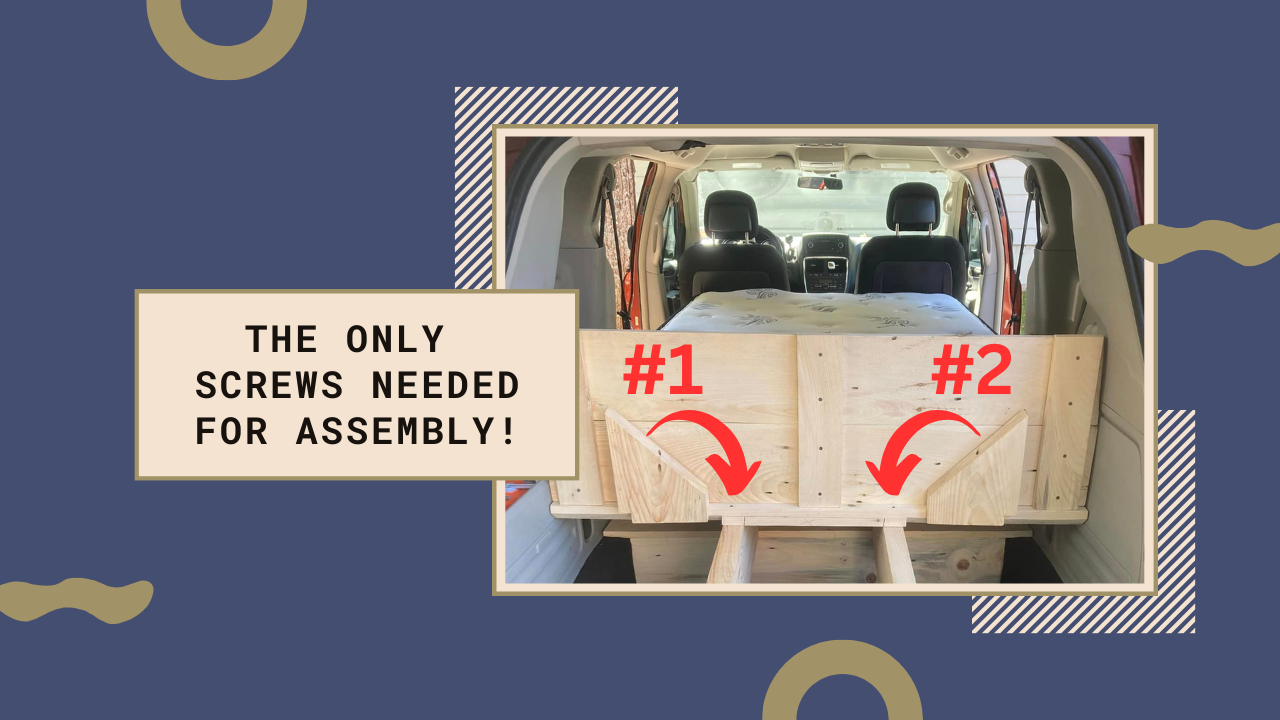
To keep the mattress from sliding around and to divide our “kitchen” from the “bedroom” we put a headboard in place.
This is the only part of the build that requires screws to assemble the build.
Step 5: The Kitchen
Apart from being comfortable while sleeping, the next most important thing is to have coffee in the morning! Camping coffee is a real thing in our world.
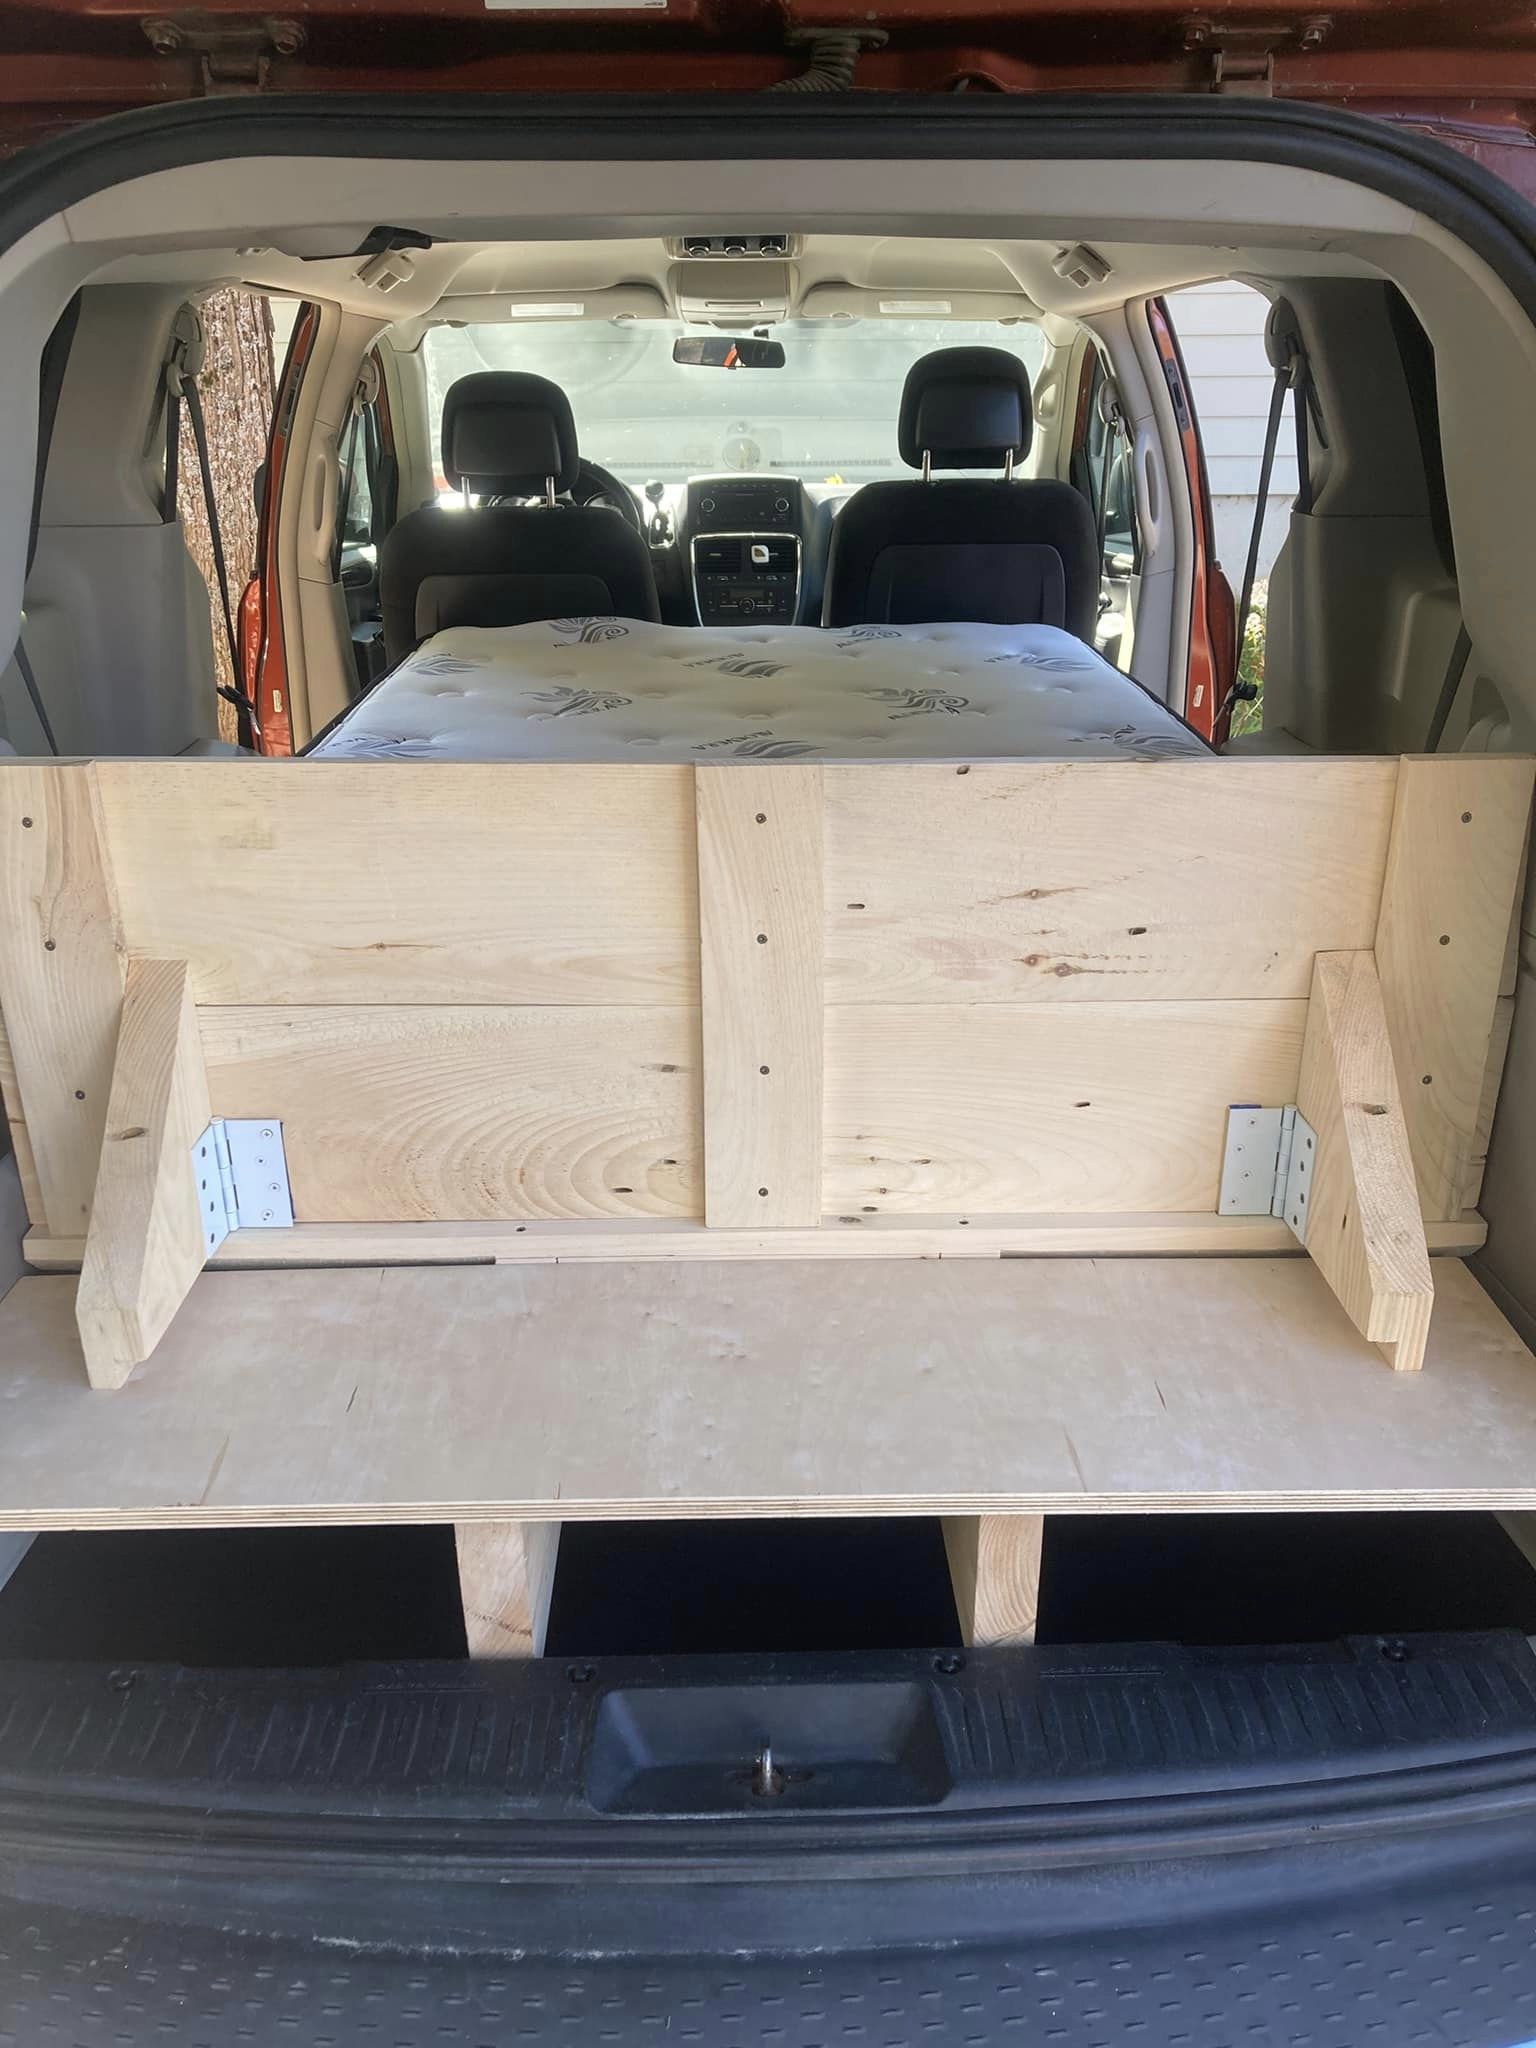
The leftover piece from the bed platform became the kitchen table and simply slides into place. the hinged wings add additional support and stability to the headboard.
We can prep food on it when necessary, or set up the Coleman stove under cover of the back door if the weather is wet.
The space under the table is for kitchen storage. I’ll talk more about that later in this note.
Step 6: Storage & Gear
Done! All that is left to do is make the bed and load up your gear.
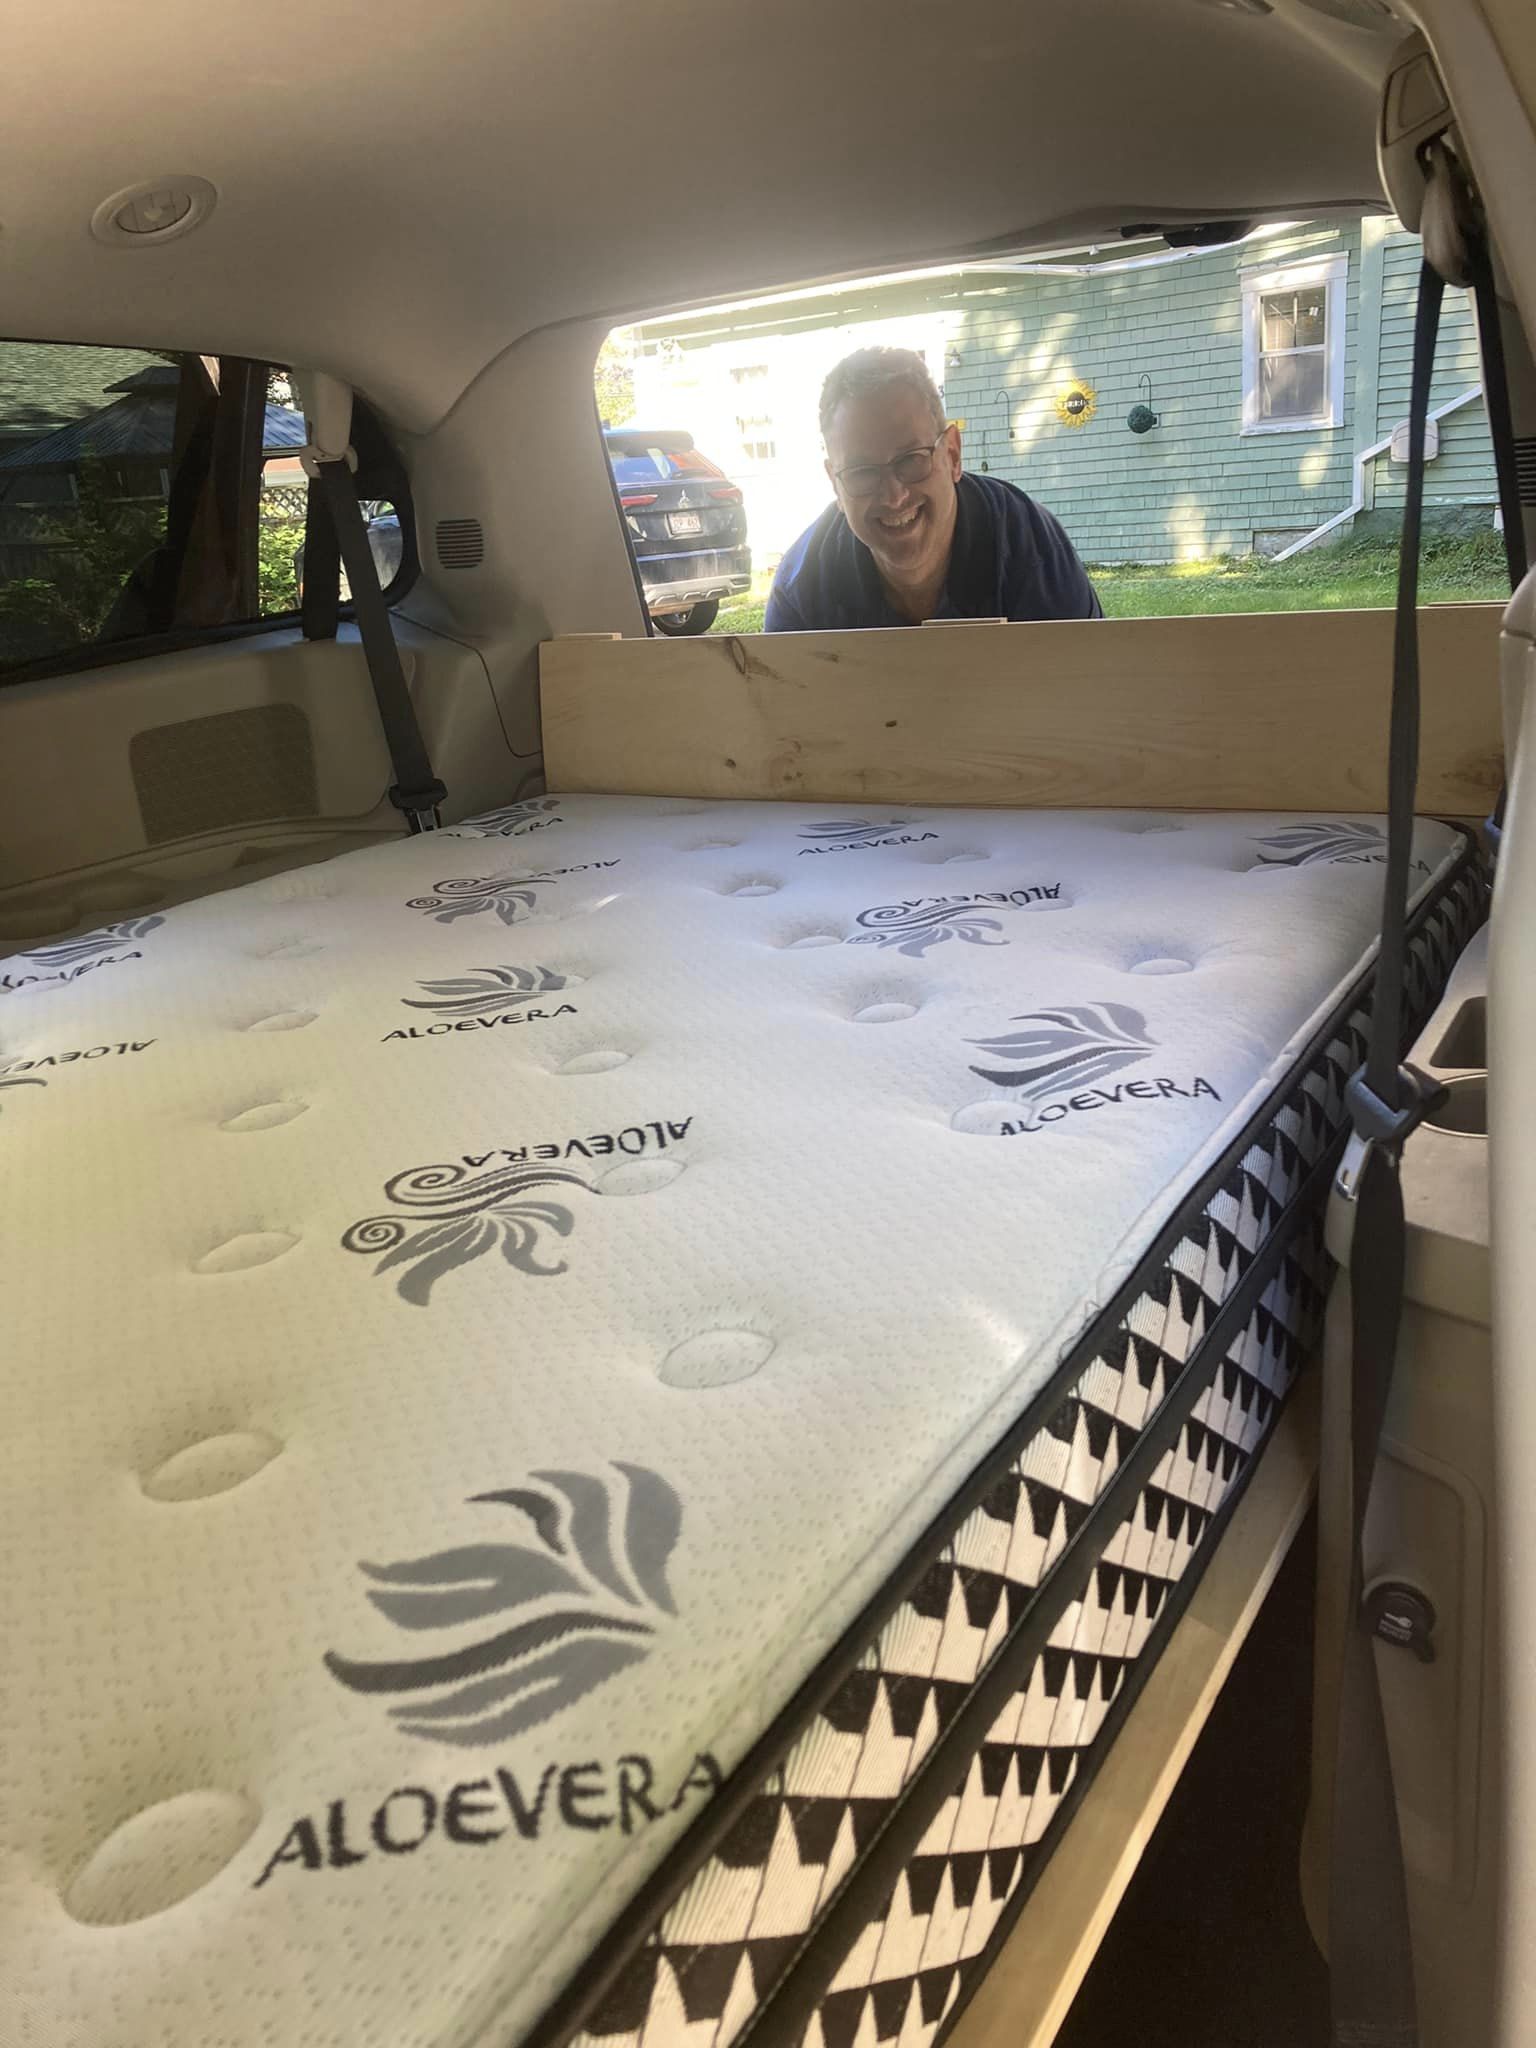
Our build has three rows with 9 compartments for storage, which we have found to be plenty of storage space.
We have gone on a 3 week road trip with Vinny and had everything we needed with us!
Row 1
Row 1 is accessible from either side of the van’s sliding doors and was designed specifically to be a pass-through.
The stowaway compartments in the floor behind the front seats (not pictured) have a tri-fold style cover that acts as a lid for them.
This makes it a great place to put extra footwear. If hiking shoes get muddy or flip flops are sandy and wet it doesn’t matter because they are stored away from clean clothes.
Over top of these compartments is where we keep in our folding chairs. Although the chairs are bulky, they can be accessed from either side of the van and easily slide in or out.
If you want to dig out some footwear you simply side the chairs over enough to flip open the shoe compartment and then slide them back in place.
Even with the chairs are in place there is room in the center compartment to keep things that we would like to easily access while driving. We often stash snacks, beverages, sunscreen, and guidebooks we have picked up along the way here.
Row 2
This is where we keep clothes and any other “junk” we decide to bring with us, and are also accessible from either side of the van via the sliding side doors.
I have several baskets that we can use to keep this space organized.
We can put our clothes in the baskets if we wish, but in practice I have found we usually just stash our backpacks or duffle bags under the bed and use the baskets for other things we have brought along.
We have his & her sides. Along with my clothes, my junk usually includes my watercolor travel set, books, sudoku, and journaling supplies. Sweeting has more practical items like a machete, folding saw, tarps, or other camping gear on his side along with his clothing.
Row 3
This space is accessible by the back door of the van and is our kitchen space. The kitchen storage dips well below the floor of the van because it is the stowaway space for the row of back seats.
We have divided the row into three compartments.
One compartment holds our full sized cooler. It will actually fit in any of the 3 slots so it doesn’t really matter how we organize the kitchen.
A second compartment holds all our food along with dishes, silverware, coffee percolator and cups.
In the final compartment we keep 3 jugs of water, the Coleman camp stove, a pot and a frying pan.
To access this area the table gets lifted out, and food and dishes are in baskets that can easily be lifted out.
We’ve Come A Long Way!
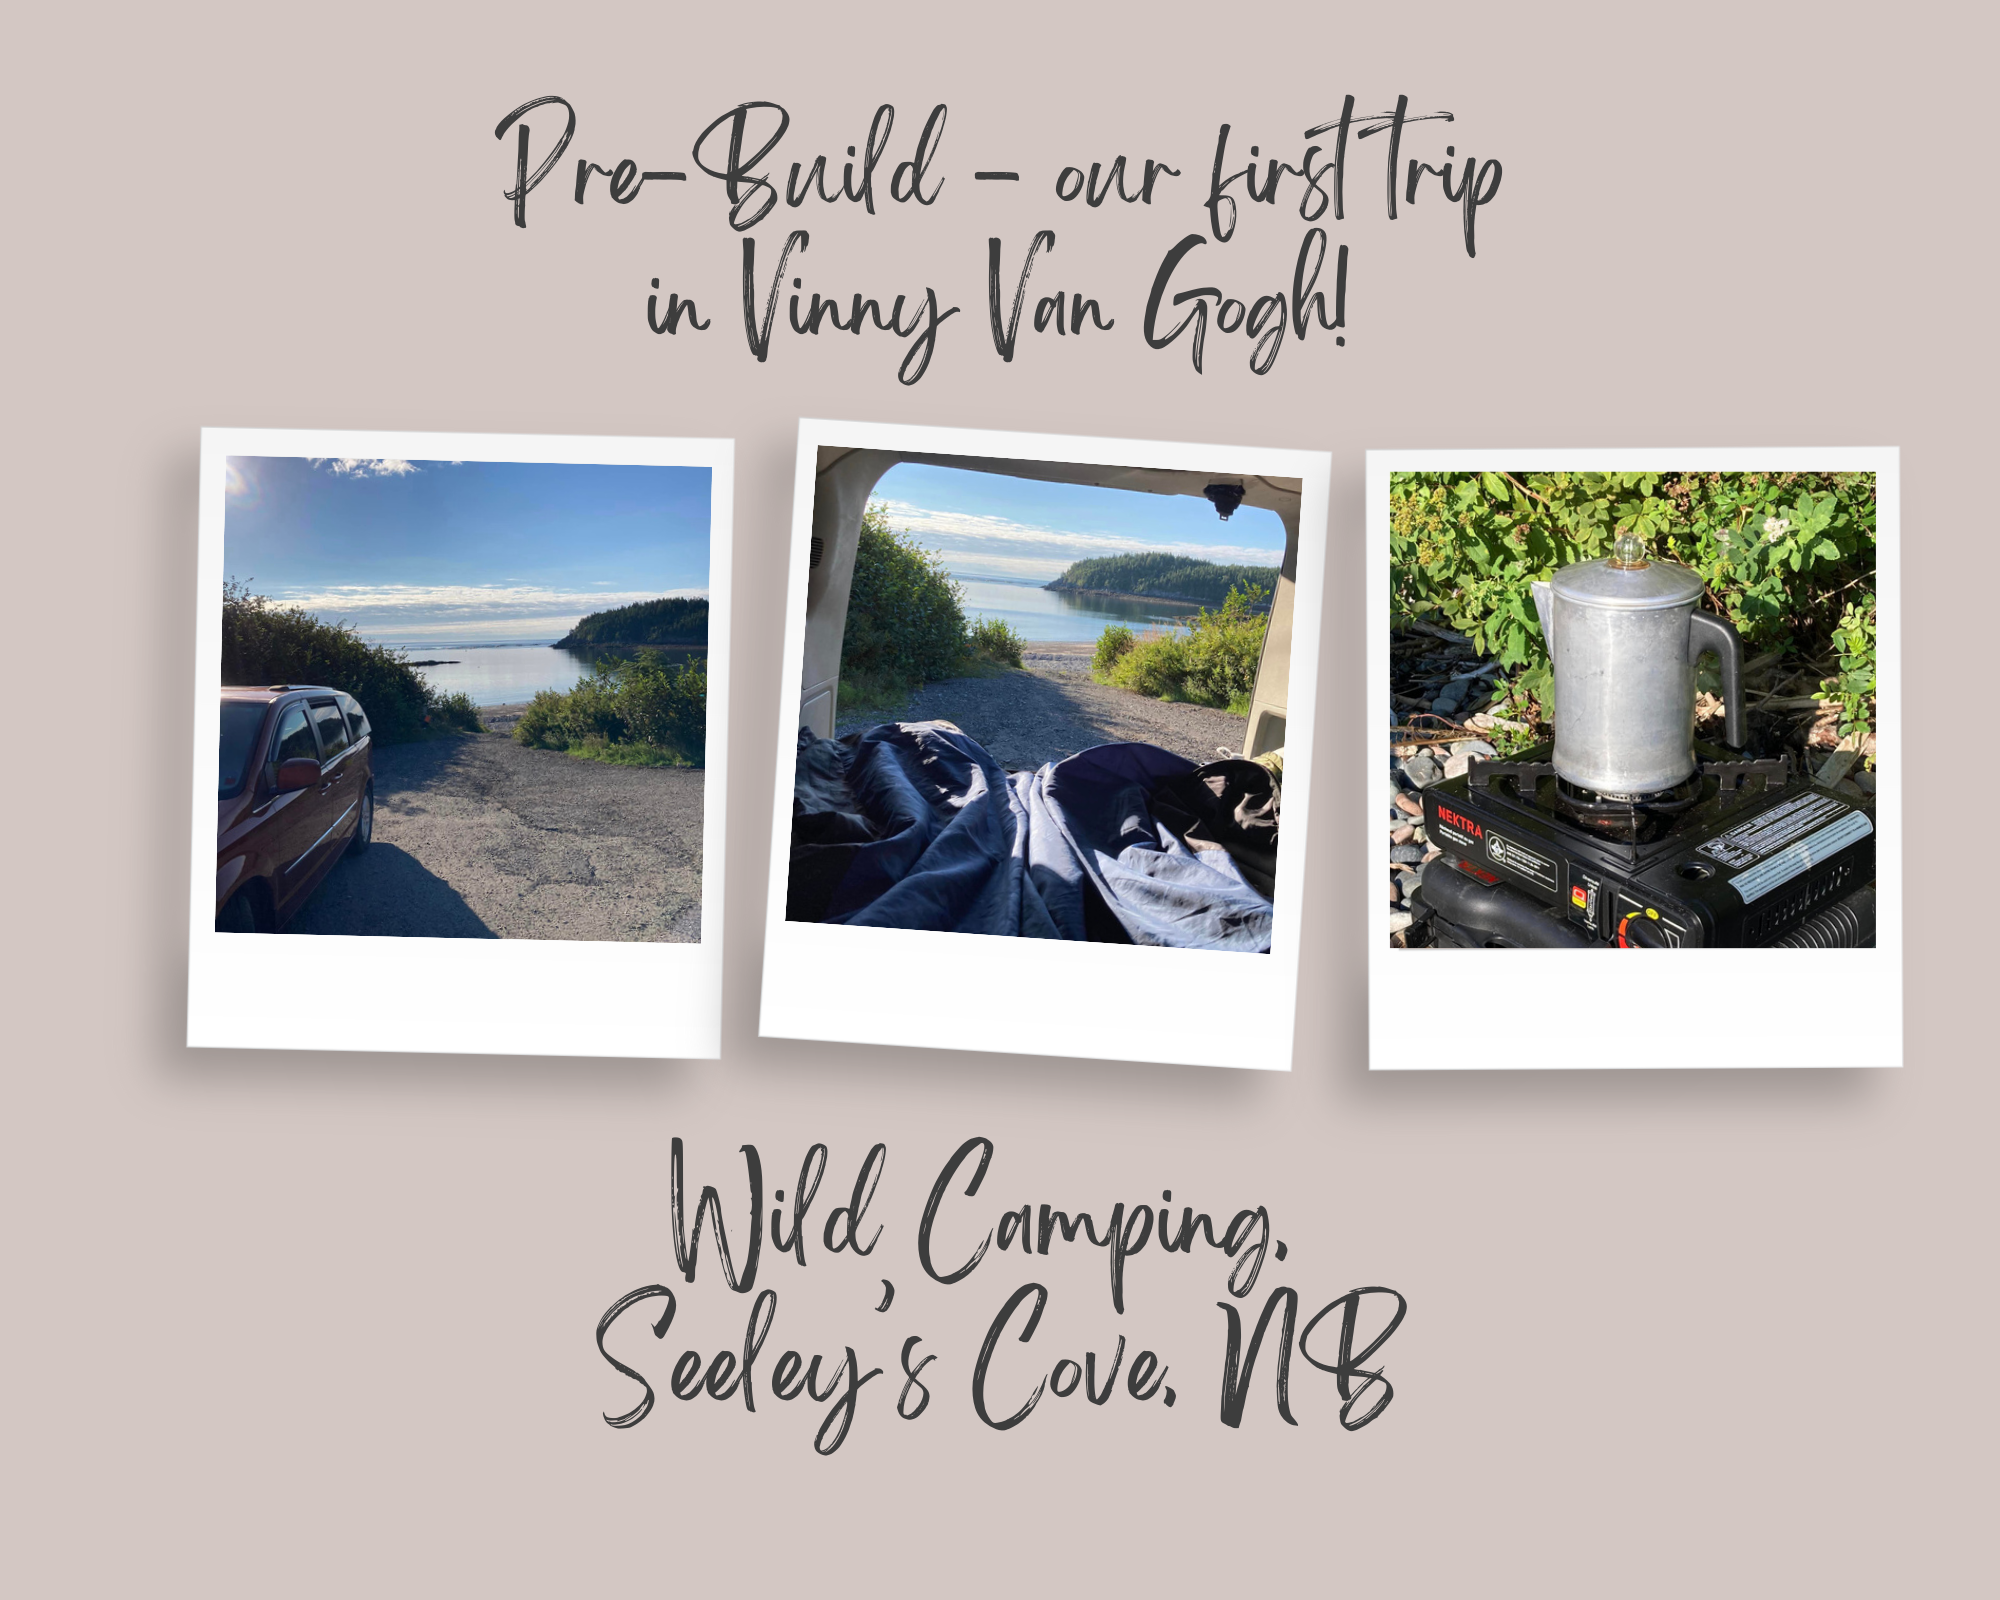
Our first trip out in the van we threw in an air mattress, our sleeping bags, and the coffee paraphernalia.
Although the view was amazing, the accommodations were still a little rough.
Vinny Van Gogh has come a long way since those days. And gone a long way covering thousands of kilometers on our adventures! In my next post I’ll share my thoughts on doing a van conversion like this and some of the places we have visited in the van in the 2 years since we did the build.
Simple Summary
As much as we all adore the Mercedes Sprinter vans, they just aren’t in the budget for the average Jack or Jill.
We see Dodge Caravans everywhere making them an easy second-hand vehicle to find at a reasonable price, and a van great choice to convert for camping. I am sure there are many other mini-vans makes out there that would also work just as well as Vinny!
What did we spend?
- Wood: $150
- Plywood: $90
- Hardware (hinges & screws): $20
- Mattress: $460
TOTAL COST: $720
These costs exclude taxes, because that varies depending on where you live.
It also excludes the cost of the vehicle itself, which for me was $7,000.
I recognize that not everyone would be comfortable purchasing a 10 year old van and/or you might already own a van. This cost could vary by thousands of dollars depending on the vehicle you choose or whether you are already a van owner.
Now that you have seen the build from beginning to end, would you consider doing this yourself?

Want free gifts...just because?


Nicely written, Nola. Sandy T sent us a link after we visited her last month as we’ve been struggling to find the “perfect” camper for us. Guess what? Perfection doesn’t exist, but what you’ve done is just right for the two of you. Having had a Caravan and used it for weekend camping (when our VW camper died yet again), I agree that it is surprisingly do-able.
Thanks Cathleen. A VW camper would be amazing fun and I have read that the Westfalia is coming back to North America in 2024, so maybe you have spent just long enough trying to decide on the “perfect” camper that a new option has opened up! The mini-van conversion is easier than most people think and good value for what you have to spend to get them on the road. We have had so many adventures that we wouldn’t have had without Vinny. As you say, surprisingly doable!